» Linux
Create user
If multiple users emails will be retrieved and saved on the local server, you should create a seperate account for each user. It will make managing their emails and settings much easier.
But first, you should setup a seperate static ip for each account you want to setup. Here's instructions on how to add a new ip to the server:
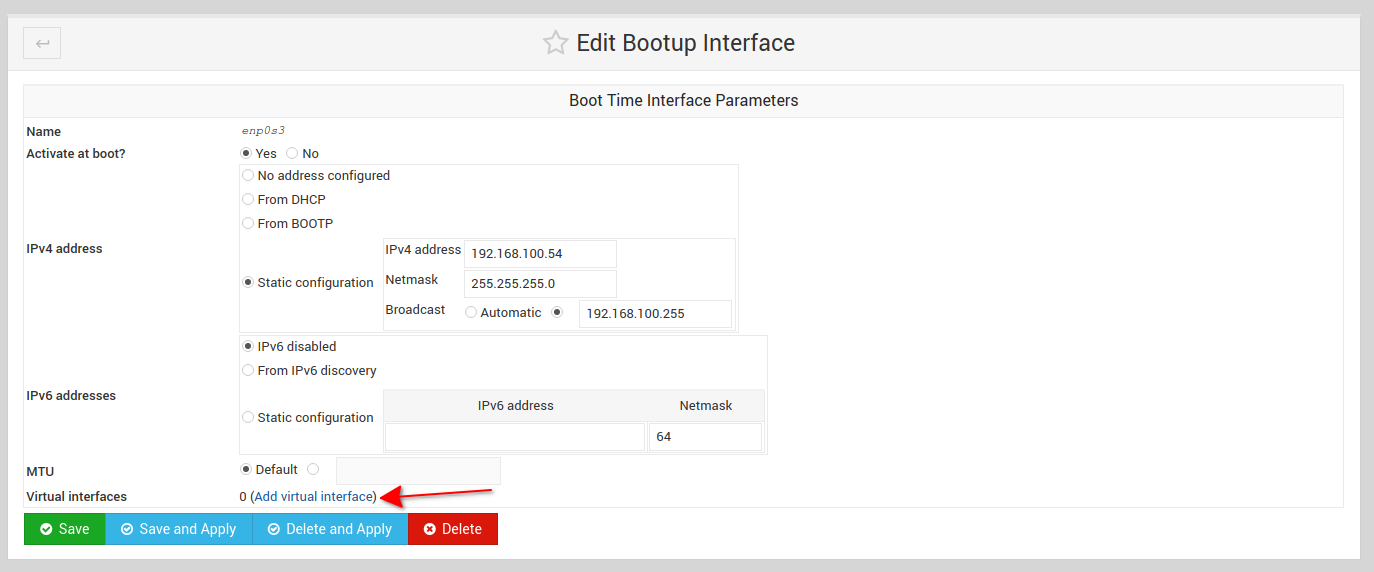
Go into Webmin > Networking > Network configuration > Network interfaces. Click on the main network interface as shown in the picture below:

Click on the Add virtual interface link as shown in the picture below.
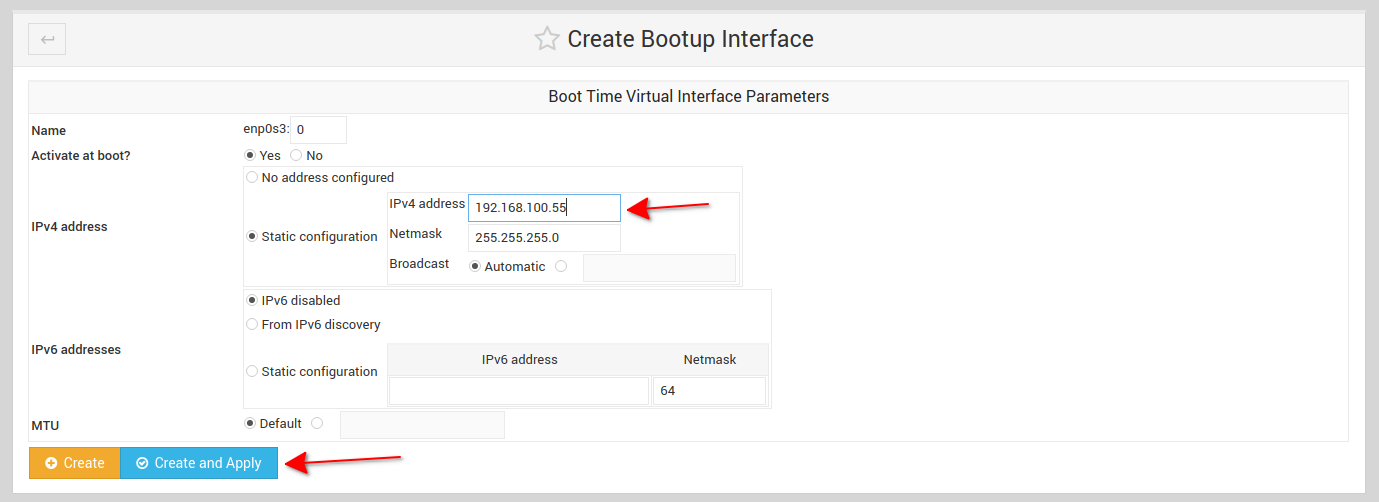
Add the new ip to the network interface. In the image below, I've added ip 192.168.100.55 . Then click on the Create and Apply button to add the ip to the server.
The new ip should then appear in the list of ips in the Network interfaces page.

Repeat the above process for as many ips you want to add - one ip for each user account.
Creating new account on the server
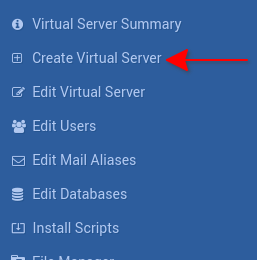
From the Virtualmin section, click on the Create virtual server link.
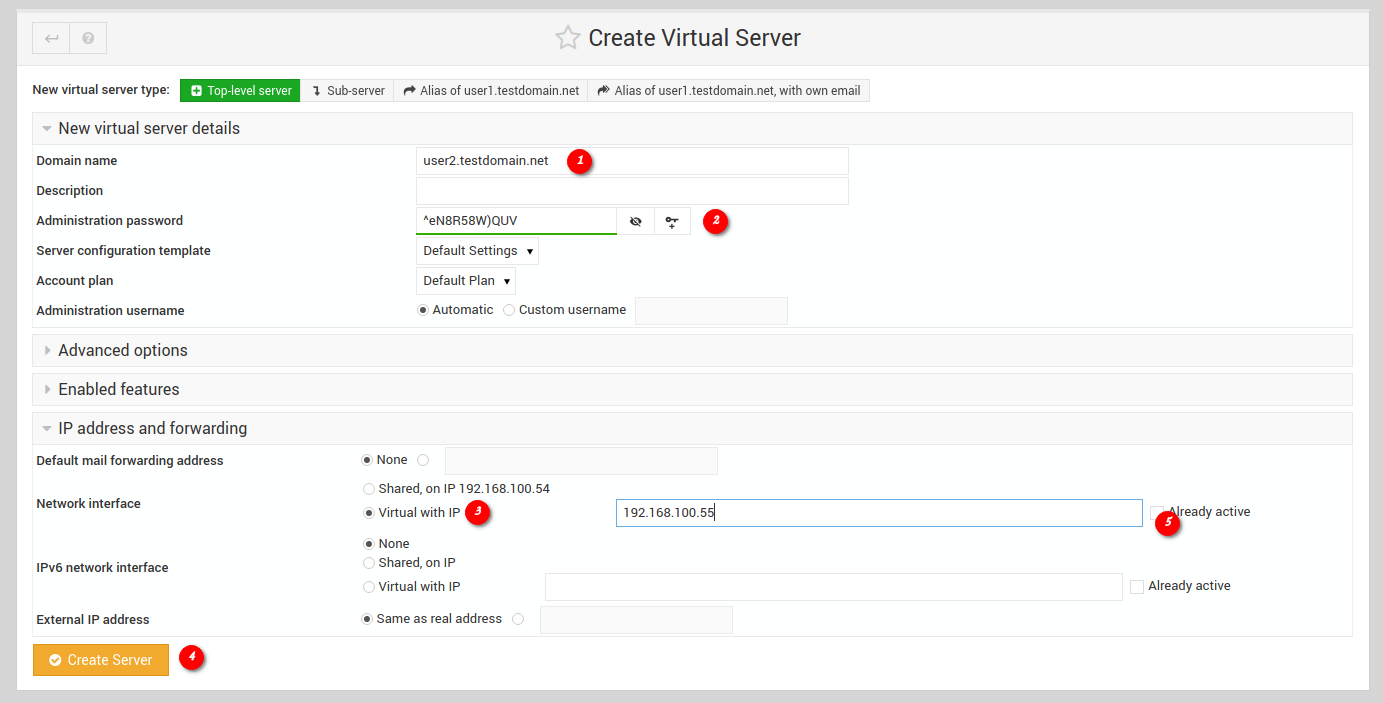
The form below will appear where you can provide the account information to setup on the server.
1. Domain name - since this is a local server, the domain name won't be active so you can use any domain name you want that will allow you to identify the account you are setting up.
2. Administration password - a password that will give you access to the new account. This password will also be used when you will be access the webmail software and also to connect to the IMAP server.
3. Network interface - For this setting, select the option Virtual with IP and enter one of the static ip you had setup earlier. Also, make sure to check the box that says Already active
4. Click on the Create server button and the new account will be setup on the server.
Next, we'll install the Roundcube webmail script so that each user can access the emails that will be retrived and saved in their respective accounts.
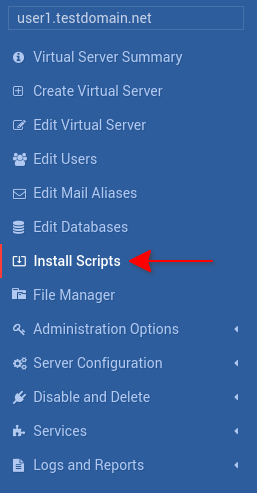
In the Virtualmin section click on the Install Scripts option in the navigation menu.
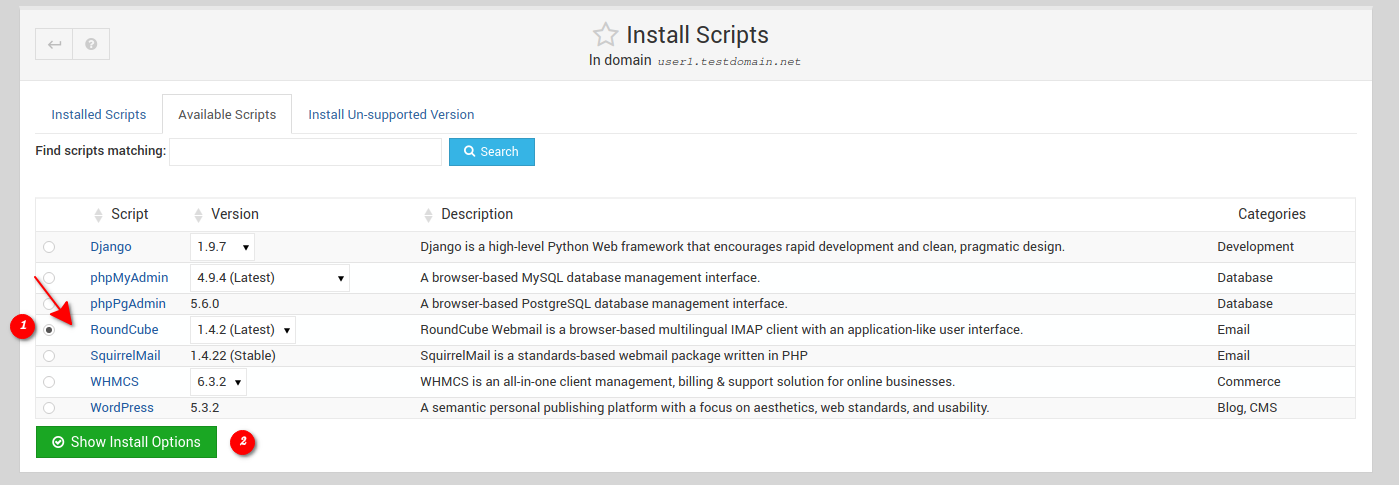
Next, select the Roundcube script and click on the Show install options button.
Here, all you have to do is specify the folder where you want the Roundcube software to be installed for the selected user. Finally, click the Install Now button and the software will be downloaded and installed automatically. After it has been installed, you will be able to access Roundcube using the user's ip address and appending the folder you chose during installation. Ex: http://192.168.100.55/roundcube - The access code will be the user account's username and password.

Repeat this process for as many accounts you want to setup on the server.